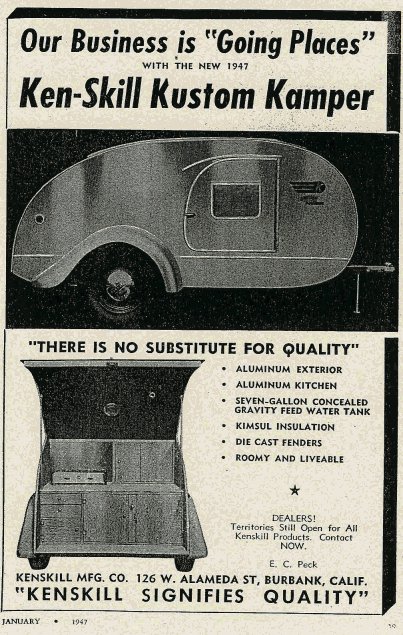
A January 1947 Teardrop advert.
After years of camping at rallies, I've finally got fed up with permanently wet knees caused by crawling in and out of tents. I had a brief flirtation with a trailer tent, but it was too heavy, too big and because it was so big it was cold.
While trawling the web for trailer tents one day I came across teradrop trailers. These small (two man) caravans were popular in the 1950's especially in America. An article appeared in Mechanics Illustrated Magazine in late 1947 containing the design. I downloaded a copy and as many pictures and bits of information that I could find..
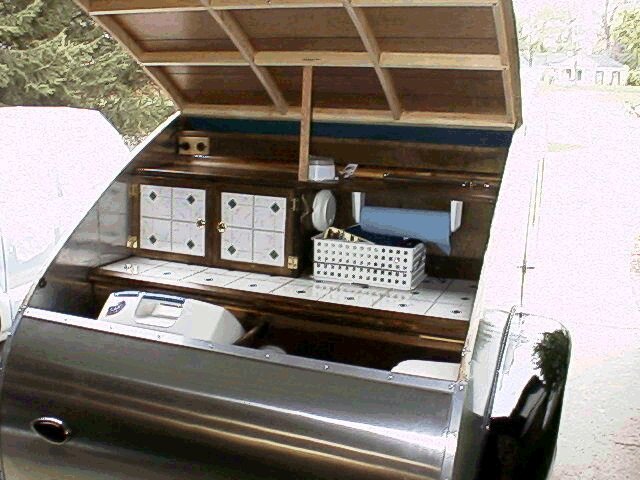
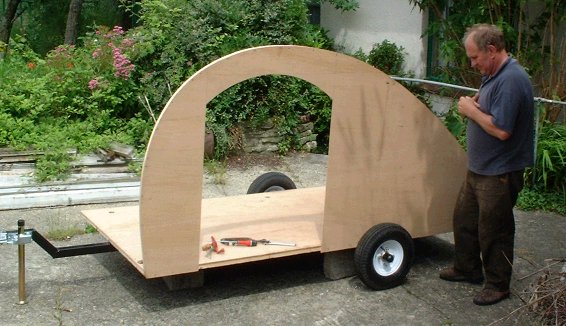
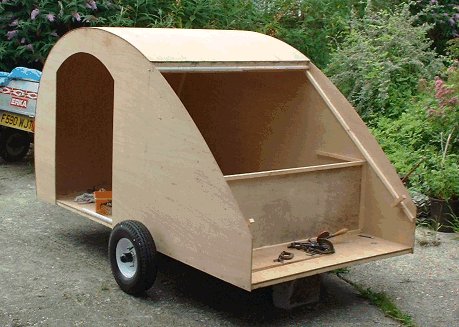
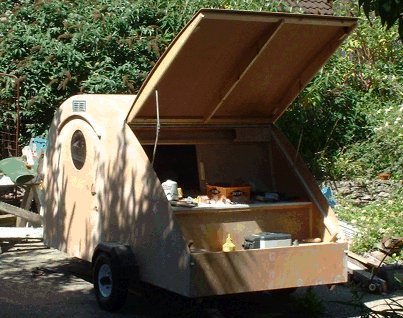
Basically there is a 6' 6" long sleeping compartment at the front and the "tailgate" opens to provide a kitchen area.
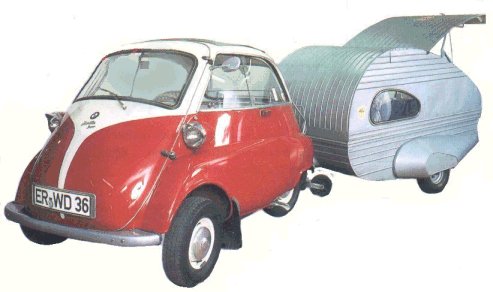
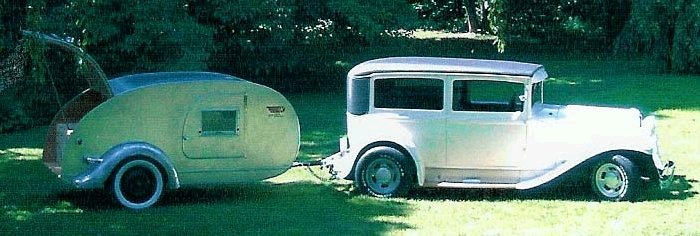
Since those days Tears seem to have developed in many different ways. Hotrodders in the States seem to be picking up on Tears as they fit with the styling (age?) of their cars. There are even Teardrop rallies. Having said that I've never seen one.
 |  |
 |  |
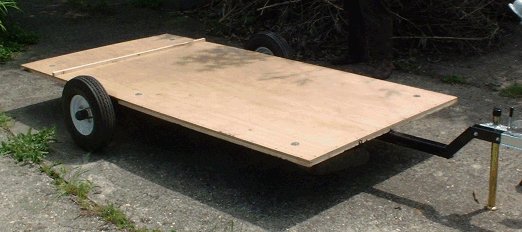
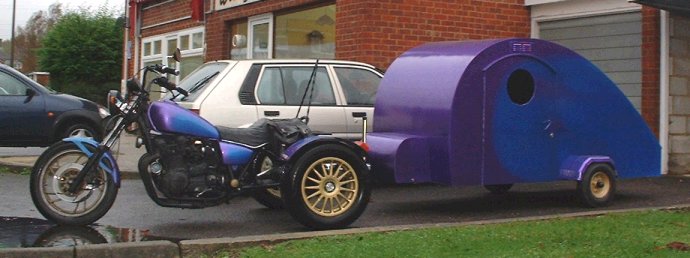
Having studied the subject for a couple of weeks I decided to have a go at building my own Tear. As the idea is to tow it behind the Trike it needs to be as light as possible. The laden weight of an unbraked trailer must not exceed half the kerbside weight of the tow vehicle. I've based my design on a standard 8' by 4' sheet of plywood. I also want the whole thing to be as low as possible. - less than 5' tall overall, hence the small wheels. I also have ideas of building a 12 Volt generator mounted on the drawbar to charge the battery used to power equipment in the Tear.


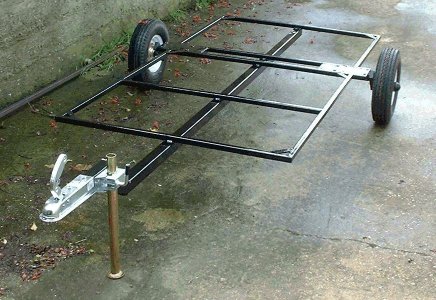
Chassis as pictured weighs 46 kgs. It is made from 25mm square tube with a 50mm main member running underneath and up to become the drawbar. All the wheels, suspension and other hardware is standard trailer stuff.
USEFUL (approx) WEIGHTS of 8' x 4' sheet of plywood:
12mm = 20 kgs
5.5mm = 8 kgs
3.6mm = 6 kgs
I've used 12mm ply for the floor, 5.5mm for the sides and 3.6mm for the roof.
 |  |  |  |
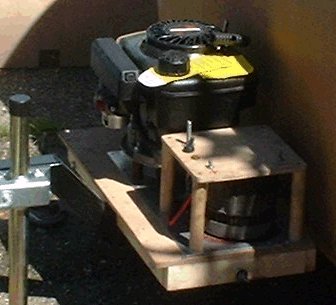 |  |  |
I bought a rotary lawnmower with a 3.5HP Tecumseh 4 stroke engine (because it was the cheapest way to buy a new engine) and a secondhand alternator from an Austin Metro. These were mounted on a 3mm aluminium alloy baseplate, not for weightsaving, it's all I had. The baseplate was mounted on on a wooden frame. I made a pulley and small flywheel to fit the engine. An "A" section belt transmits the power. A switch was wired into the circuit so that the alternator field coils were disconnected while the engine is started. If the field coils are left in circuit then the alternator is more difficult to turn, not a great help when trying to pull-start the engine. Once the engine is up to speed the switch is flicked on and charging of the batteries begins. Inside the Tear there is a 0-60-0 amp ammeter and a digital voltmeter so I can keep an eye on the battery state.
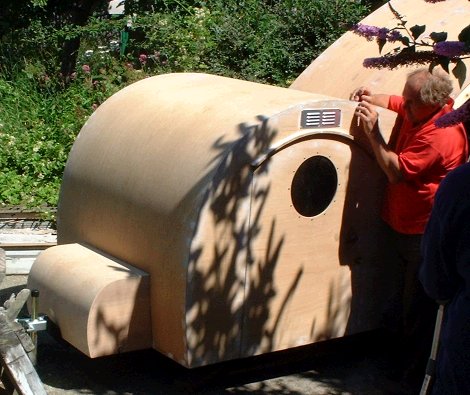
The windows were cut from clear polystyrene. That was a fun job! I marked out the circle and proceded to cut with my trusty jigsaw only to find that the plastic was welding itself back together behind the blade. Once cut out and cleaned up the windows were covered with some of that tinted window film that the boy racers use in their cars. The finished windows were bolted inside the body with a good bead of clear silicone sealant to provide weatherproofing.
Above the windows are a couple of air vents, behind the over door vent there are a pair of computer fans wired through a switch. This arrangement will enable me to ventilate the Tear in hot (or smelly) conditions.
The floor and walls of the tear are covered with rubber backed bathroom carpet, stuck on with Evo-Stik. Be very aware that Evo-Stik in confined spaces is a bad thing. I spread the glue on one wall and offered up the carpet which was cut to shape, all the time becoming more "drunk" on the fumes. Eventually I had to get out before I passed out. It wasn't altogether unpleasant, however the screaming "hangover" I got ten minutes later was.
The ceiling is covered with a polystyrene backed foil about 3mm thick, being lighter than the carpet this is held up with wallpapar paste. Will it all stay there? only time will tell.
I'm hoping that the carpet and foil will provide some degree of insulation.
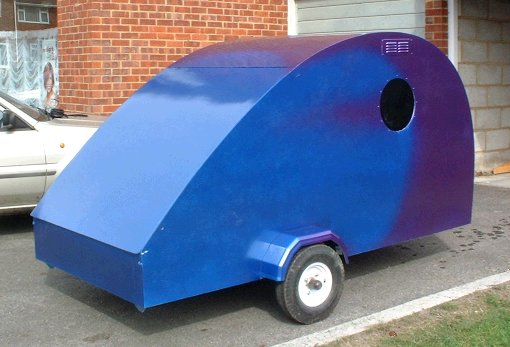 | 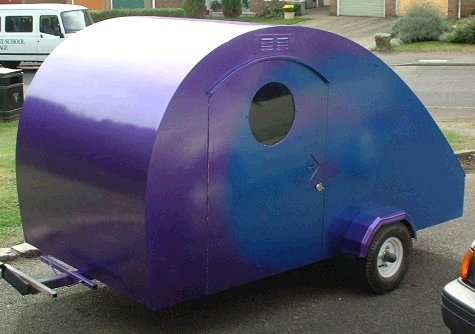 |
Tear is painted to match the Yam Trike (it matches the artists impression too!)
The paint used was car body stuff, in my day it was cellulose, heaven only knows what they use these days. BE WARNED spray paint will not fill the grain in plywood. Every time a coat was applied it looked good then the grain would come out again, so if you are thinking of going down this route you will need some sort of grain filler.
 |  |
The first outing (in pouring rain) was to the NABD's excellent Bonfire Bash at Haslebury Mill near Crewkerne on the first weekend of November 2002.The gazebo didn't survive the gale force winds, but the tear was dry and I slept off the ground - heaven!
Feb 15th 2003. A party organised by the Moonrakers MCC at Pilton, Somerset. A great party but a very cold night. I was alright, although I'm not sure if it was because of the Tear's insulation or because I was full of an alcohol based anti-freeze (John Smiths).
While I was at the Kit Car Show mentioned below, I purchased a new 3m x 3m gazebo from Classic Marquees (0151 4243913). A far sturdier steel framed affair than the old ally one that got trashed at Crewkerne. I had the opportunity to test the new gazebo at the Southwest Bike Show at the beginning of May 2003. Other than the fact that it moved because I forgot to peg it down (too keen to get to the bar!), once set up it was great. The sides flapped a bit and it could do with some decent guy ropes as the nylon string supplied is a bit naff, but altogether I was very pleased with the way it stood up to the wind and rain.
I went to the Kit Car Show at the Devon County Showground near Exeter (17/11/02) looking for ideas for indepenent rear suspension for the Yam Trike. I was pleasantly surprised to find this Teardrop Trailer kit there. It's made of fibreglass, will take a 4' X 6'6" mattress inside and costs Ł999.
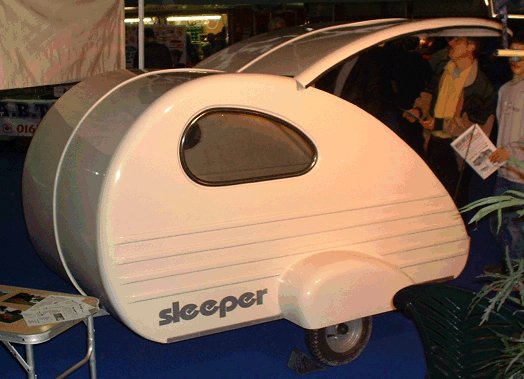 | 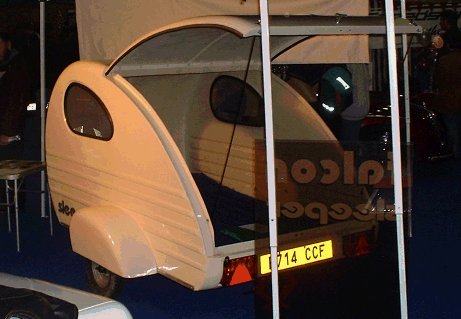 |
It's called the "Sleeper", it's made by Falcon Design based in Lincolnshire and if you're interested you can ring/fax them on 07041 492149 or e-mail falconcars@lineone.net.
I'll update this page as the Teardrop story progresses.